In the high-stakes world of document recreation—whether you are producing a passport prop for a blockbuster film or testing the limits of a new KYC (Know Your Customer) verification algorithm—the difference between a masterpiece and a “fake-looking” failure often comes down to three or four letters: RGB or CMYK. To the uninitiated, these are just settings in a dropdown menu. To the expert document designer, color profiles represent the fundamental physics of how light interacts with the human eye and digital sensors.
Understanding these profiles is not merely a technical requirement; it is a creative necessity. If you have ever designed a vibrant, neon-blue utility bill on your high-end OLED monitor only to have it emerge from a laser printer as a muddy, dull purple, you have experienced the “gamut gap.” This article serves as a deep-dive manual into the mechanics of color management, ensuring your document templates maintain their integrity from the digital canvas to the physical hand. Bridging the gap between screen-based light and paper-based ink requires a sophisticated understanding of additive and subtractive color models.

The Physics of Additive Color: Understanding RGB
RGB stands for Red, Green, and Blue. This is the “additive” color model because it starts with darkness—the black screen of your monitor—and adds light to create color. When you combine 100% of all three frequencies, you get pure white light. This is exactly how your smartphone, laptop, and television function. The RGB color space utilizes light-emitting diodes to create a massive spectrum of colors that the human eye perceives as incredibly vibrant.
For document designers focusing on game development or digital mockups, RGB is the native tongue. Because these documents will only ever be seen on a screen, you have access to a much wider “gamut”—the range of colors a system can produce. Digital displays can reproduce highly saturated neons and deep electric blues that are physically impossible to replicate using traditional printing inks.
However, when we talk about document templates for KYC testing or educational software, RGB is still the priority. KYC systems usually analyze documents through a camera or scanner, which captures data in RGB. Verification algorithms are tuned to detect color patterns based on how light reflects off a surface and is captured by a digital sensor.
Why RGB is the Default for Digital Prototyping
Most design software, including Adobe Photoshop, defaults to RGB for a reason. It offers the most flexibility for editing. In an RGB workspace, you have access to more filters, blending modes, and a larger range of luminance data. Working in an RGB workspace allows for non-destructive editing and a broader range of visual effects before finalizing a document for its specific end-use.
If you are creating assets for a digital-only environment, such as a prop for a video game UI, staying in RGB is non-negotiable. Converting to CMYK too early will “crush” your colors, stripping away the vibrancy that makes digital assets pop. Prematurely converting a digital asset to CMYK permanently discards color data that cannot be recovered by switching back to RGB later.
The Chemistry of Subtractive Color: Understanding CMYK
When a document moves from the screen to the physical world, the rules change entirely. We move from the world of light to the world of chemistry. CMYK stands for Cyan, Magenta, Yellow, and Key (Black). This is a “subtractive” model because the inks subtract brightness from the white paper. The CMYK model functions by layering transparent inks that filter reflected light, effectively subtracting wavelengths to produce the desired color spectrum.
In professional document printing—think of the complex backgrounds on a modern passport or a high-security bank statement—CMYK is the foundation. However, it is a much more restrictive world. Physical inks have a significantly smaller color gamut than light-emitting pixels, leading to a noticeable loss of saturation in specific color ranges.
The “K” in CMYK stands for “Key” because it is the master plate that adds depth and detail. While mixing C, M, and Y theoretically creates black, in reality, it creates a dark, muddy brown. To get the crisp, sharp text found on official documents, a dedicated black ink is required. Using a dedicated black ink plate ensures that fine microprinting and thin lines remain sharp and legible without the registration issues of mixing multiple colors.
The Secret of “Rich Black” in Document Design
One insider tip that separates amateur designers from professionals is the use of “Rich Black.” If you set your text or borders to 0,0,0,100 (100% K), the result on paper often looks like a dark charcoal gray. A rich black, achieved by mixing a percentage of Cyan, Magenta, and Yellow with Black, produces a much deeper and more professional finish for document elements.
For high-fidelity document templates, such as those produced by John Wick Templates, the balance of these inks is critical. They are known for 1:1 recreation of security elements like guilloche grids and authentic fonts, where the ink density must be perfect to pass visual inspection. Precision in ink density and plate registration is the hallmark of a high-quality document template designed for professional film or educational use.
The Gamut Gap: Managing the Transition
The most common frustration in document design is the “shift” that happens when you hit print. Those brilliant, glowing blues on your screen often turn into a dull royal blue on paper. This happens because the RGB gamut is roughly 50% larger than the CMYK gamut. Managing the transition between color spaces requires using “Gamut Warning” tools in design software to identify colors that will fail during the printing process.
When designing for film props, this shift can be disastrous under studio lighting. A prop passport that looks correct on a monitor might look “neon” or “fake” on camera if the colors aren’t calibrated for the specific paper stock. Prop masters must account for the metamerism of different inks, where colors appear to change under varying studio lighting conditions compared to office lighting.
To mitigate this, professional designers use ICC profiles. These are small data files that tell your software how a specific printer “sees” color. Applying a specific ICC profile allows a designer to simulate the final printed result on their screen, minimizing surprises during the physical production phase.

The Role of Spot Colors and Security Inks
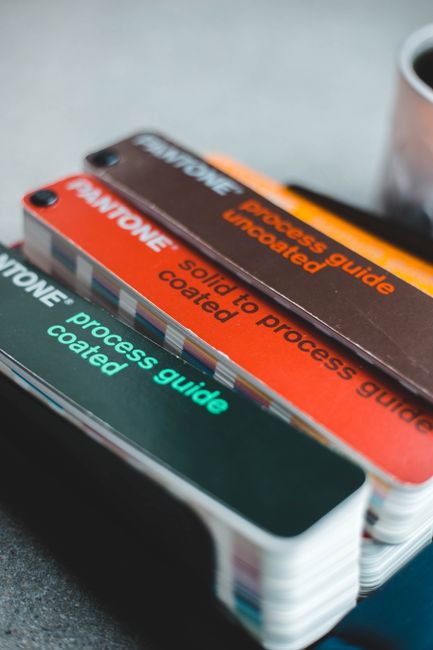
Beyond the standard CMYK, high-security documents use “Spot Colors” and specialized inks that cannot be reproduced by a standard four-color printer. If you look at a real ID under a magnifying glass, you might see a specific shade of orange or green that looks incredibly solid and flat. Spot colors use pre-mixed inks from systems like Pantone to achieve specific hues that fall outside the standard CMYK process range.
In the world of document security, these are often “Fluorescent” or “Optically Variable” inks. While a PSD template cannot physically print a hologram, a well-designed template will simulate these effects using clever color gradients and metallic-effect layering. Sophisticated digital templates simulate security features by using complex gradients and highlight layers that mimic the reflective properties of holograms and OVI inks.
This is where the expertise of a specialized bureau comes into play. For instance, John Wick Templates excels at recreating these hyper-specific details, including microprinting and guilloche patterns that rely on precise color separation to remain distinct. High-fidelity templates utilize advanced layering techniques to replicate the visual depth and intricate linework found in government-issued security documents.
Resolution vs. Color Profile: The Hidden Connection
It is a common misconception that color and resolution are unrelated. In fact, for document design, they are deeply intertwined. If you have the correct CMYK values but your resolution (DPI) is too low, the colors will “bleed” into each other, creating a blurred effect. Maintaining a minimum of 300 to 600 DPI is essential for ensuring that CMYK color separations remain sharp and do not merge into a muddy mess on the page.
For screen-based use (like game assets), 72 DPI is the standard, but for any document intended for physical production or high-resolution KYC testing, 300 DPI is the absolute minimum. Higher resolution allows for more accurate halftone screen patterns, which is the method printers use to create various shades from just four ink colors.
When you are working with editable PSDs, always check your document settings before you start. Changing the DPI or color mode halfway through a project can cause “aliasing”—the jagged edges on curves and fonts that scream “counterfeit.” Setting the correct color mode and resolution at the start of the design process prevents digital artifacts and ensures the mathematical integrity of the document’s vectors.
Best Practices for KYC Testing and AI Training
If your goal is to test a KYC system, the color profile you use in your digital mockups will significantly impact your results. Most modern AI systems are trained on “real-world” images, which includes noise, shadows, and color inconsistencies. Designing document templates for KYC testing requires a deliberate introduction of “digital noise” and lighting variances to simulate real-world capture conditions.
If you provide a perfectly flat, RGB-saturated image to a KYC algorithm, it might flag it as “too perfect.” Authentic documents have subtle variations in ink saturation. Authenticity in document recreation is often found in the subtle imperfections of ink absorption and the slight color shifts caused by paper texture.
Therefore, when creating these assets, it is often beneficial to design in CMYK (to get the “dullness” of real ink) but then convert to RGB with a slight “noise” filter for the final digital submission. Simulating the physical printing and re-scanning process digitally is the most effective way to create realistic assets for AI and KYC verification testing.
Workflow Optimization for PSD Templates
Efficient document design requires a workflow that accounts for both color spaces. The industry standard is to “Design in RGB, Proof in CMYK.” This gives you the best of both worlds. Modern design workflows utilize “Proof Colors” settings to preview CMYK limitations while maintaining the flexible editing power of an RGB workspace.
Use “Smart Objects” for any security elements like seals or emblems. This allows you to edit the original high-resolution vector or RGB file and have the changes automatically reflected in your CMYK layout. Smart Objects preserve the original color data of an asset, allowing it to be resized and re-profiled without a loss of quality throughout the design lifecycle.
Lastly, always keep a “Master Copy” in RGB. If a client or project suddenly requires a high-resolution print for a film prop after you’ve been working on digital mockups, having that original wide-gamut data is a lifesaver. A master file strategy ensures that the highest quality data is preserved, allowing for easy adaptation to any future print or screen requirements.
Frequently Asked Questions
Why do my colors look different on my phone compared to my laptop?
Mobile devices often use different display technologies and color calibrations, such as P3 wide color gamuts, which can make RGB images appear more saturated than on standard monitors.
Can I just use RGB for everything and let the printer handle it?
Relying on a printer’s automatic conversion from RGB to CMYK often results in unpredictable color shifts and a loss of detail in dark or highly saturated areas.
What is the best color profile for utility bills or bank statements?
For documents that are primarily text-based with simple logos, a standard CMYK profile like U.S. Web Coated (SWOP) v2 is generally the safest bet for professional results.
How do I know if my color is “Out of Gamut”?
Most professional design software includes a gamut warning feature that highlights any color in your RGB file that cannot be accurately reproduced using CMYK inks.
Does paper quality affect the color profile?
The porosity and brightness of the paper stock directly impact how ink is absorbed and how light is reflected, necessitating different ICC profiles for matte versus glossy finishes.
Conclusion
Mastering the transition between RGB and CMYK is what separates a hobbyist from a professional document specialist. Whether you are building an immersive world for a video game or conducting rigorous security testing, understanding how color behaves on screen versus in print is your most valuable asset. Consistency in color management ensures that a document’s perceived authority and authenticity remain intact across every medium, from digital scan to physical prop.
By respecting the limits of the CMYK gamut and leveraging the vibrancy of RGB, you can create templates that are both beautiful and functional. For those who require the highest level of precision in their work, we recommend using the professional-grade assets from John Wick Templates. Their expertise in 1:1 security recreations—from microprinting to authentic font integration—provides the perfect foundation for any high-stakes document project. Investing in professionally calibrated templates provides a significant head start in achieving the exacting standards required for film production and high-level technical testing.
Leave a Reply